Matched Content

Showing posts with label transportation. Show all posts

Thursday, March 19, 2026

Cas Aki Berindikator Dengan Charger Laptop


Charger laptop dapat digunakan untuk mencas atau setrum aki mobil dan sepeda motor dengan menyesuaikan tegangannya. Biasanya tegangan charger laptop sekitar 19 volt. Jadi tegangan tersebut perlu diturunkan, agar aki tidak kelebihan tegangan (overcharged) dan charger tidak rusak.

Prosedur ini cukup mudah dan rangkaiannya sederhana namun handal, dengan komponen yang mudah didapat di pasaran, dan gampang dirangkai.

Terdapat dua lampu indikator LED agar memudahkan operasi.

Baca juga penjelasan detail tentang proses isi-ulang atau cas aki.

Baca juga cas aki dengan charger laptop yang menggunakan IC pengatur tegangan.

PERHATIAN: sebelum cas aki dilakukan cek level air aki terlebih dulu. Dan tutup aki tetap dibiarkan longgar di lubangnya selama aki dicas agar ventilasi gas lebih baik. Cas berlebihan dapat meledakkan aki. Tegangan cas maximum untuk aki sel kering sekitar 13.8 volt, sedangkan untuk aki basah sekitar 14.4 volt, harap berpatokan pada spesifikasi aki anda untuk mencegah cas berlebihan (overcharged).

Rangkaian sederhana ini menurunkan tegangan charger laptop agar sesuai dengan tegangan dan arus cas aki.


Komponen yang digunakan adalah:

D1 - D8 = dioda BY127, arus rata- rata 1 sampai 1,5 ampere

L1 = LED warna hijau 5 mm

L2 = LED warna putih 1 watt, surface-mount device (SMD, dipasang pada permukaan)

Dz = dioda zener 12 volt 1 watt

R1 = resistor 2,7 kilo ohm, 0,5 watt

R2 = resistor 6,8 kilo ohm, 0,5 watt

R3 = resistor 120 ohm, 1 watt

S= sekring 1 sampai 3 ampere, tergantung besarnya beban, dalam hal ini aki.

Arus maximal yang dibutuhkan aki saat pengisian adalah  sekitar 10 persen dari kapasitas aki. Jadi untuk aki 36 ampere jam, arus maximal cas adalah 3.6 ampere, jika aki tersebut sangat kosong atau sangat rendah tegangannya.

Charger laptop yang digunakan pada artikel ini mempunyai tegangan 19 volt dan arus maximal 3,95 ampere, sebagaimana foto berikut.

Sehingga cukup kuat untuk mengisi aki berkapasitas 36 ampere jam.

Rangkaian di atas akan menurunkan tegangan 19 volt dari charger laptop menjadi sekitar 13 sampai 14 volt dengan melalui beberapa dioda.

Lampu-lampu LED berfungsi sebagai indikator. 

LED putih menandakan sistem bekerja baik dan siap digunakan. LED putih menyala saat rangkaian tanpa beban. LED ini sengaja dibuat besar, agar menurunkan tegangan sehingga terbaca lebih normal, saat tanpa beban.

LED hijau akan menyala saat adanya beban yang mengkonsumsi arus, misalnya saat sedang cas aki. Pada saat rangkaian diberi beban, maka LED putih akan padam. 

Secara teoritis, jika arus melalui satu buah dioda, maka tegangan output akan turun sebesar 0,6 volt. Karena dioda membutuhkan tegangan maju (forward voltage).

Pada saat terkoneksi dengan charger laptop 19 volt. Tegangan output tanpa beban yang terukur dengan melalui 8 dioda adalah 15,4 volt. 

Perlu diperhatikan, walau tegangan ini sepertinya terlalu tinggi untuk cas aki. Tegangan akan turun jika rangkaian diberi beban. Hal ini sesuai sifat dioda, yang mana tegangan maju (forward voltage) akan naik jika arus bertambah, sehingga tegangan output akan turun jika arus output meningkat.

Saat rangkaian tanpa beban, lampu LED putih menyala terang. Sebagai tanda rangkaian siap digunakan. Sedangkan lampu LED hijau menyala sangat redup.

Jika rangkaian diberi beban 220 ohm, maka tegangan turun menjadi 14,3 volt. Dengan arus output sekitar 0,065 ampere. Pada saat ini lampu LED putih mulai meredup, sedangkan LED hijau menyala terang. 

Tegangan menjadi 12,9 volt jika diberi beban 24 ohm, dengan arus sekitar 0,5 ampere. Pada saat ini lampu LED putih sudah mulai padam. Sedangkan lampu LED hijau tetap menyala terang.

Tegangan menjadi 12,5 volt jika diberi beban 12 ohm. Dengan arus sekitar 1 ampere. LED hijau tetap menyala terang. LED putih padam, karena tegangan tidak cukup untuk memungkinkan arus melalui rangkaian LED putih dan zener.

Tegangan tersebut di atas termasuk normal untuk cas aki. Jika tegangan menjadi dinilai terlalu rendah, maka jumlah dioda bisa dikurangi, agar didapat tegangan output yang lebih tinggi. Dioda dikurangi mulai dari bagian akhir output (D8), misalnya: output diambil dari D7, atau bahkan dari D6. Koneksi suplai arus ke LED putih bisa dipindah jika dioda dikurangi, bisa juga tidak dipindah.

Jika arus kontinyu yang dibutuhkan kurang dari 0,5 ampere, misalnya untuk cas aki motor, maka bisa menggunakan dioda yang lebih kecil seperti 1N4007. Berhubung dioda ini sangat popular, banyak pabrikan yang memproduksi, tapi kadang kualitasnya kurang bagus.

Lihat juga videonya di Youtube:


Foto di bawah memperlihatkan susunan rangkaian yang sederhana sehingga bisa menggunakan papan matrix, dengan komponen-komponen bekas yang didaur-ulang.


Arus pengisian akan mengecil seiring naiknya tegangan aki. Jika tegangan aki sudah sama dengan tegangan charger maka arus pengisian akan sangat kecil.

Saat tegangan aki mencapai sekitar 14 volt, lampu LED hijau akan meredup. Dan jika kondisinya dan pengaturannya tepat, biasanya terjadi jika mencas aki yang ukurannya kecil, lampu LED putih akan mulai menyala kembali. Sebagai indikator menandakan bahwa aki mulai penuh.

Resistor 1 (R1) berfungsi sebagai pengaman, jika rangkaian power suplai ini dihubungkan ke beberapa sirkuit dengan IC yang tidak tahan dengan tegangan tinggi yang 'bocor' akibat induksi dari trafo. Jadi R1 bisa dihilangkan jika kondisi dianggap aman.

Keunggulan rangkaian ini adalah sangat handal, karena tiada komponen aktif seperti transistor maupun IC (Integrated Circuit) yang rawan rusak. Sederhana cara kerjanya, sehingga mudah dimengerti, komponen banyak tersedia di pasaran, juga mudah dirangkai. Jikapun rusak, maka mudah juga diperbaiki.

Kelemahannya adalah tidak ada stabilisator tegangan. Tegangan bisa turun saat beban naik, dan tegangan kembali naik saat beban turun. Karena dioda membutuhkan tegangan maju (forward voltage) saat mengalirkan arus.

Tapi turun naiknya tegangan justru digunakan untuk mengaktifkan lampu-lampu indikator. Dan karena rangkaian disuplai dengan charger laptop yang stabil tegangannya, maka tegangan output dapat dianggap sudah cukup stabil, untuk aplikasi seperti mencas aki.

Secara teoritis efisiensi daya rendah, karena adanya kehilangan tegangan pada dioda  dan berubah jadi panas. Pada kenyataannya, kenaikan temperatur dioda tidak signifikan.


Thursday, December 26, 2024

ANENG AN9002 Multitester Battery Voltage Graph Interpretation


The ANENG AN9002 multitester is connected via Bluetooth to a Samsung Galaxy A04 cellphone. The display shows the car battery voltage before starting, and until the engine is running. With a Bluetooth connection, the battery voltage can be monitored remotely with a graphic display on the cellphone.

The graphic display makes the multitester functions similarly to an oscilloscope. More details about the ANENG AN9002 digital multitester.

As seen in the graph, the initial voltage of the car battery is around 12.8 volts.

The car battery voltage when the contact is in the Acc (accessories) position is around 12.7 volts.

In the On contact position, the battery voltage drops to around 12.6 volts. There is a small curve in the graph when the contact is positioned to On. This is because the fuel pump, relays, and instruments on the dashboard (fuel meter, temperature, odometer, indicator lights, etc.) are activated.

When starting the engine, the battery voltage drops to 10.56 volts.

The battery voltage then rises to 14.75 volts when the alternator is active, because the alternator is driven or rotated by the engine.

Conditions such as those in the graph above are quite normal.

Watch YouTube video about car accu voltage before and after start.


In the above video the voltage is slightly different. When engine start the voltage drops to 10.39 volts. This condition is basically still normal.


Meanwhile, in the following graph, the battery voltage can be seen to drop more deeply.


At the beginning of the graph is when the contact is in the Acc position, with a battery voltage of around 12.7 volts.

The battery voltage drops to 9.22 volts when the engine is starting.

Then the voltage rises to 14.71 volts, when engine is running. This indicates that the alternator is still working well.

Some causes of a very low or dropping battery voltage when starting, include:

  • The battery has a weak storage capacity. Although the initial voltage still looks normal at around 12.8 volts. But the battery current capacity has started to decrease. So the voltage drops when starting, due to lack of electric current. For example, the normal capacity of a battery is able to produce an electric current of 40 amperes for one hour (40 Ah, ampere-hours), generally on sedans. If the battery is old, its capacity will decrease. For example, it can only flow an electric current of 25 amps in one hour (25 Ah). Because there are dirt deposits on the battery cells, which prevents the battery cells from contacting the electrolyte (battery water).
  • Both positive and negative battery connectors have poor connections. Maybe because they are loose, or because they are dirty.
  • The starter motor is dirty. Especially in the carbon brush section. So it needs to be opened and cleaned. Dust from the carbon brushes collects. The carbon dust is an electrical conductor, and can cause internal current leakage in the starter. So that some of the electric current from the battery does not rotate the starter motor. But short circuits inside the starter.


It could also happen that the battery voltage does not drop when starting. Still above 11 volts. But the starter is difficult to turn. This could be an indication that the battery is still good. Some possible failures are:

  • The positive wire from the battery connected to the starter solenoid is loose or dirty.

  • The negative wire from the battery to the vehicle body is dirty, loose, or rusty. There is also a negative wire that is connected from the battery directly to the engine block, or from vehicle body to engine block.

  • The wire from the ignition switch to the starter solenoid is loose or dirty. Causing the solenoid not to function properly.

  • The switch in the solenoid is dirty or damaged (worn, burned). Some solenoids can be dissasembled to clean the switch contacts. While others must be replaced when faulty.


The function of the solenoid on the starter is as a relay to allow a large electric current flow directly from the battery to the starter. Because the current is very large, it cannot go through the ignition switch or other circuits on the vehicle. Large currents require large cable and connectors, and are well connected.

If the large current to the starter is resisted, the starter is unable to rotate properly, aka lack of power. And the battery only produces a small current. That is why the battery voltage not to drop much when the starter is turned on.

The solenoid also functions to shift the small gear (pinion gear) of the starter, so that it engages with the ring gear on the flywheel. So that the starter can rotate the crankshaft. When the starter does not work, the gear will be released from the flywheel. So that the starter will not rotate with the crankshaft, when the engine is running.

Signs of a bad starter solenoid include: 

  • Nothing happens when you turn the key
  • A single “click” sound from the engine compartment or under the car
  • Repeated “clicking” sounds
  • Intermittent operation
  • A spinning starter without an engaged flywheel
  • A slow-cranking engine

All symptoms of a damaged solenoid as above, are usually indicated by the battery voltage not much dropping. When the starter is turned on.

The basic principles explained in this article can also be applied to motorcycles, pickup, minibus (MPV), jeep (SUV), and other vehicles. Especially those with 12 volts electrical circuits.

Monday, February 21, 2022

Honda i-DSI: Jazz, Fit, City, Civic, Spark Plugs Replacement


The Honda i-DSI (Intelligent Dual & Sequential Ignition) has two spark plugs per cylinder. Each pair of spark plugs is ignited sequentially with intervals between them, depending on engine speed and load. This results in a more complete combustion of gasoline. That is why fuel consumption is so economical.

This spark plug replacement procedure is also can be seen on YouTube video below. 


As the space becomes cramped and congested, replacing spark plugs becomes more difficult. But if you know how to do it, it will be much easier. only by using a few simple hand tools. In the photo below you can see: 3/8 inches ratchet handle, 10 mm socket, 16 mm spark plug socket, 3/8x3 inches extension, 3/8x6 inches extension.


A 10 mm socket wrench is used to remove and install: the cover that reads i-DSI, and the spark plug coils. In total there are 2 pieces of 10 mm head size bolts (M6 thread) for the cover, and 8 pieces of 10 mm bolts to secure coils.

The retainer ball in the extension must be strong enough. So that the spark plug socket is not left in the spark plug hole when installed. Because the position of the spark plug is in the hole as deep as about 13 cm.


Inside the spark plug socket there is a rubber as plug holder. The rubber holds spark plug, to ensure plug does not fall when it will be installed, or when taking the spark plug from the spark plug hole. Also to keep the position of the spark plug in a straight line with the socket and the thread on the cylinder head, in order to prevent damage to the thread.


Below photo shows how to test the strength of the locking ball (spring-loaded detent ball). Connect the extension to the spark plug socket. Insert spark plug into the socket. As in the photo below, the left hand holds the extension, the right hand pulls the spark plug out of the socket. The spark plug must be able to detach from the socket, while the extension must remain connected to the socket.


Because of the narrow and deep spark plug space. Spark plug socket can be left in the spark plug hole, and difficult to be taken out. Especially if the position of the spark plug hole in the back row.


The photo below shows the position of the four spark plug coils in the front row.


The row of four coils on the back is a bit difficult to see. In the photo below they are indicated by the numbers. The coil position are about under those numbers.


The rear number four spark plug position is the narrowest. The photo below shows the position of the rear number four coil.


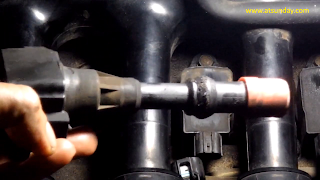
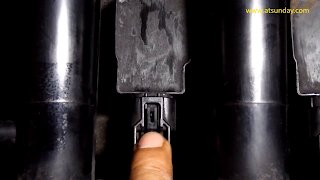
Disconnect all the cable connectors on the coil, by pressing the clip on the connector. Then the connector is pulled to release. Don't pull the cord.


The photo below shows two no clip connectors, because they are broken. But those connectors are still good and can be used.


Also remove all the coil connectors on the back row.


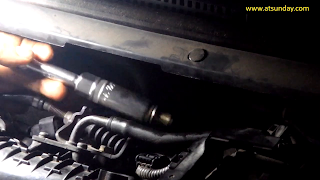
Remove the bracket that holds the rear wiring, near the number four rear spark plug. In the photo below, you can see the left hand holding the wiring, and the index finger pressing the locking clip. Then the cable is pushed to the backward of the car, until it is released from the bracket. The photo also shows the position of the clip near the throttle cable, which is transverse along the photo. 


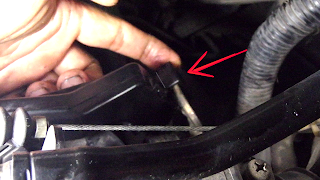
Remove the bracket that holds the rear coil wiring. In the photo below shows the bracket in the red circle, near the engine oil fill hole, or near the rear number one spark plug. The wiring is held by the left hand, and removed from the bracket by pushing towards the left side of the car body, or towards the right side of the photo.

By detaching and freeing the coil wiring harness from those two brackets, it will provide space to remove coils and spark plugs.

Remove all 10 mm coil holder bolts, using a 10 mm socket wrench.


Once the bolt is removed, the coil can be easily removed from the spark plug hole by pulling it up.


The photo below shows the spark plug hole about 13 cm deep.


Actually the spark plug may be removed now. But sometimes there is oil or dirt that gets into the spark plug hole. If the spark plug is removed, the oil will enter the combustion chamber, which can cause scale and make valves leak, resulting in reduced compression and low power.

If the oil that enters the combustion chamber is plenty. When engine is started, oil can cause the piston to jam, because the oil cannot be compressed, or it is called a hydraulic lock. If this happens, then you must open spark plugs in all cylinders, at least one spark plug per cylinder. Make sure no coil connector is connected to prevent electric spark and gasoline burning. Then start the engine, so that the oil that enters into combustion chamber is pumped by the piston, and exits through the spark plug hole.

 Cut cardboard about 15x3 cm. Bend slightly lengthwise to make it stiffer. As the photo below.


 Insert the cardboard into the spark plug hole.


The cardboard will absorb the oil that has accumulated in spark plug hole. This oil can come from seepage of the seal on valve cover. This is especially happened in the rear spark plug hole.


If there is an air compressor with a long nozzle, so it can fit into the spark plug hole. Then the dirt and oil that collects in the spark plug hole can be sprayed by the compressor. So that compressor air blows out dirt and oil.

To remove the rear number four spark plug, connect a 3 inches extension to the spark plug socket.


Insert socket and 3 inches extension into the rear number four spark plug hole. Due to the depth of the hole, the extension height of 3 inches is about the mouth of the hole. So there is no room for the ratchet handle. 


Connect the 6 inches extension, to extend the 3 inches extension. So that the ratchet can be connected and rotated from above, as in the photo below.


Loosen and remove the rear number four spark plug with a ratchet. It can be seen in the above photo that the space above the ratchet's head is limited.

Because of this narrow space, the connection of a 3 inches extension, then a 6 inches extension, then a ratchet handle, must be done one at a time or in stages.

 After the spark plug is removed from the cylinder head. Remove the ratchet. Socket and both extensions cannot be lifted at the same time because the narrow space. The next steps are: the right hand lifts the 6 inches extension, until fingers of the left hand can catch the 3 inches extension. Then 6 inches extension is pulled and disconnected. 


Then the left hand holds and lifts the 3 inches extension, along with the socket and spark plug to be replaced.


Installing a new spark plug is the reverse of removing the old spark plug procedure. Insert the new spark plug into the socket. With a 3 inches extension, the socket and spark plug are inserted into the spark plug hole. Then connect with a 6 inches extension and a ratchet handle.

See photo below. The left hand ensures a perpendicular extension. The right hand holds the ratchet, near the head of the ratchet. Turn ratchet clockwise, so that the spark plug fits into the cylinder head thread. Rotate with the ratchet until the spark plug reaches the bottom.


Move your right hand to the end of the ratchet, as in the photo below. Strengthen by half a turn, or about 180 degrees. This way ensure spark plug is fitted tightly. But also it is still easy to be  removed later when the next replacement.


The spark plugs used in this procedure are:

NGK BKR6E-11

Denso K20PR-U11

There is another way to prevent the socket from being left in the spark plug hole, by removing the rubber plug holder in the socket. In this way the spark plug will be left in the spark plug hole after being loosened. Then the spark plug is pulled out by tools such as tweezer, plier or crocodile plier.

Then a new spark plug is put into the spark plug hole by plier. The socket is inserted into the spark plug hole while rotating slowly, so that the spark plug is caught by the socket. After the spark plug is in the socket, it is directed into the thread in the cylinder head. Then the socket is turned clockwise so that the spark plug is fitted.

Because the spark plug is not held in the socket, this method is successful in preventing the socket from being left in the spark plug hole. But this method should not be recommended. When the spark plug is inserted into the hole, there is a possibility of falling and change the spark plug gap. Also, because the spark plug is not properly gripped by the socket, it is possible that the spark plug does not fit properly into the cylinder head thread. So that it can damage the thread in the cylinder head, and it will be expensive to repair.

Wednesday, January 26, 2022

Ganti Busi Honda i-DSI : Jazz, Fit, City, Civic


Honda i-DSI (intelligent Dual & Sequential Ignition) mempunyai dua busi per silinder. Setiap pasang busi dinyalakan secara berurutan dengan interval antara keduanya, tergantung pada putaran mesin dan beban. Sehingga dicapai pembakaran bensin yang lebih sempurna. Itulah sebabnya konsumsi bahan bakar jadi irit.

Video prosedur penggantian busi ini dapat dilihat di YouTube.


Karena ruangan menjadi sempit dan padat, maka penggantian busi jadi lebih sulit. Tapi jika tahu caranya, maka akan jauh lebih mudah. Peralatan atau kunci yang digunakan juga tidak banyak. Pada foto di bawah terlihat: gagang ratchet 3/8 inci, socket 10 mm, socket busi 16 mm, extension 3/8x3 inci, extension 3/8x6 inci.
 

Kunci socket 10 mm digunakan untuk melepas dan memasang: tutup (cover) yang bertuliskan i-DSI, dan koil-koil busi. Total ada 2 baut ukuran kepala 10 mm (ulir M6) untuk cover, dan ada 8 buah baut 10 mm untuk koil-koil.

Bola pengunci (retainer ball) pada extension harus cukup kuat. Agar socket busi tidak tertinggal di dalam lubang busi saat dipasang. Karena posisi busi berada di dalam lubang sedalam sekitar 13 cm.


Di dalam socket busi terdapat karet pemegang busi. Gunanya agar busi tidak jatuh saat akan dipasang atau saat mengambil busi dari dalam lubang busi. Juga untuk menjaga agar posisi busi lurus terhadap socket dan ulir pada kepala silinder (cylinder head), agar mencegah kerusakan ulir.


Untuk menguji kekuatan bola pengunci. Sambung extension ke socket busi. Masukkan busi ke dalam  socket. Seperti foto di bawah, tangan kiri memegang extension, tangan kanan menarik busi keluar dari socket. Busi harus bisa terlepas dari socket, sedangkan extension harus  tetap tersambung dengan socket.


Karena sempit dan dalamnya ruang busi. Socket busi yang tertinggal di dalam lubang busi, sulit dikeluarkan. Apalagi jika posisi lubang busi di deretan belakang. 
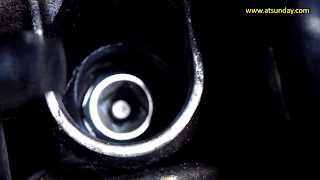

Foto di bawah menunjukkan posisi empat buah koil-koil busi di deretan depan.


Deretan empat buah koil-koil di bagian belakang agak sulit dilihat. Pada foto di bawah ditunjukkan dengan nomor-nomor. Posisi koil di bawah nomor-nomor tersebut.


Posisi busi nomor empat belakang paling sempit. Foto di bawah memperlihat posisi koil nomor empat belakang.


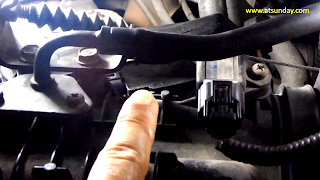
Lepaskan semua konektor-konektor kabel pada koil. Dengan cara menekan klip pada konektor. Lalu konektor ditarik agar terlepas. Jangan menarik kabelnya.


Foto di bawah menunjukkan konektor-konektor yang tidak ada klipnya, karena sudah patah. Tapi konektor-konektor ini masih baik dan bisa dipakai.


Lepaskan juga semua konektor-konektor koil di deretan belakang.


Lepaskan bracket yang memegang kabel belakang di dekat busi nomor empat belakang. Pada foto di bawah, terlihat tangan kiri memegang kabel, dan telunjuk menekan klip pengunci. Lalu kabel didorong ke belakang mobil, hingga terlepas dari bracket. Pada foto juga terlihat posisi klip berada didekat tali gas (throttle cable) yang melintang sepanjang foto.


Lepaskan bracket yang memegang kabel koil belakang. Pada foto di bawah memperlihatkan bracket dalam lingkaran merah, di dekat lubang pengisian oli, atau di dekat busi nomor satu belakang. Kabel dipegang dengan tangan kiri, dan dilepas dari bracket dengan mendorong ke arah kiri bodi mobil, atau ke arah kanan foto.


Dengan terlepas dan terbebasnya kabel-kabel (wiring harness) koil dari kedua bracket, maka akan memberi ruang untuk melepas koil dan busi.

Lepaskan semua baut 10 mm pemegang koil, dengan menggunakan kunci socket 10 mm.


Setelah baut terlepas, koil dapat dengan mudah dicabut dari lubang busi dengan menarik ke atas.


Foto di bawah memperlihatkan lubang busi sedalam sekitar 13 cm. 


Sebenarnya busi sudah dapat dibuka. Tapi kadang ada oli atau kotoran yang masuk ke dalam lubang busi. Jika busi dibuka, maka oli akan masuk ke ruang bakar, yang dapat menyebabkan kerak dan membuat katup-katup (valve) menjadi bocor, sehingga kompresi berkurang dan tenaga menurun (low power).

Jika oli yang masuk ke ruang bakar sangat banyak. Maka saat distarter, dapat menyebabkan piston macet akibat oli tidak bisa terkompresi, atau disebut hydraulic lock. Jika hal ini terjadi, maka harus membuka busi di semua silinder, minimal satu buah busi per silinder. Pastikan tidak ada konektor koil yang tersambung, agar tidak terjadi percikan busi dan pembakaran bensin. Lalu distart agar oli yang masuk ke ruang bakar terpompa oleh piston, dan keluar melalui lubang-lubang busi. 
Gunting kertas karton sekitar 15x3 cm. Tekuk sedikit secara memanjang agar lebih kaku. Sebagaimana foto di bawah.


Masukkan kertas karton ke dalam lubang busi.


Kertas karton akan menyerap oli yang terkumpul di lubang busi. Oli ini bisa berasal dari rembesan perapat (seal) pada tutup klep (valve cover). Hal ini terutama terjadi pada lubang busi belakang.


Jika ada kompresor angin dengan nozzle yang panjang, sehingga bisa masuk ke dalam lubang busi. Maka kotoran dan oli yang terkumpul dalam lubang busi bisa disemprot angin kompresor, agar terhembus keluar.

Untuk melepaskan busi nomor empat belakang, sambungkan extension 3 inci pada socket busi.


Masukkan socket dan extension 3 inci ke dalam lubang busi nomor empat belakang. Karena dalamnya lubang, tinggi extension 3 inci berada di sekitar mulut lubang. Sehingga tidak ada ruang untuk gagang ratchet.


Sambung extension 6 inci, untuk memperpanjang extension 3 inci. Agar ratchet bisa disambung dan diputar dari atas, sebagaimana foto di bawah. 


Kendurkan dan lepaskan busi nomor empat belakang dengan ratchet. Terlihat ruang di atas kepala ratchet yang pas-pasan.

Karena ruang yang sempit inilah, maka pemasangan extension 3 inci, lalu extension 6 inci, kemudian gagang ratchet, harus dilakukan satu per satu atau bertahap.

Setelah busi terlepas dari kepala silinder. Lepaskan ratchet. Socket dan kedua extension tidak bisa diangkat sekaligus karena sempit. Maka lakukan tahap berikut, tangan kanan mengangkat extension 6 inci, sampai jari tangan kiri bisa menangkap extension 3 inci. Lalu tarik dan lepaskan extension 6 inci.


Kemudian tangan kiri memegang dan mengangkat extension 3 inci berikut socket dan busi yang akan diganti.


Pemasangan busi yang baru adalah kebalikan dari prosedur membuka busi lama. Masukkan busi baru ke dalam socket. Dengan extension 3 inci, socket beserta busi dimasukkan ke dalam lubang busi. Lalu sambung dengan extension 6 inci dan gagang ratchet.

Lihat foto di bawah. Tangan kiri memastikan extesion tegak lurus. Tangan kanan memegang ratchet, di dekat kepala ratchet. Putar ratchet searah jarum jam agar busi masuk ke dalam ulir kepala silinder. Putar dengan ratchet sampai busi mencapai dasar.


Pindahkan tangan kanan ke ujung ratchet, sebagaimana foto di bawah. Perkuat dengan setengah putaran, atau sekitar 180 derajat. Dengan cara ini busi cukup kuat terpasang. Tapi juga tetap mudah dilepas nanti saat penggantian selanjutnya.


Busi yang digunakan pada prosedur ini adalah:

NGK BKR6E-11

Denso K20PR-U11

Ada cara lain untuk mencegah socket tertinggal di lubang busi. Adalah dengan melepas karet pemegang busi di dalam socket. Pada cara ini busi akan tertinggal di dalam lubang busi sesudah dikendorkan atau dibuka. Lalu busi ditarik keluar dengan alat penjepit seperti pinset, tang jepit atau tang buaya. 

Kemudian busi yang baru diletakkan ke dalam lubang busi dengan penjepit. Socket dimasukkan ke dalam lubang busi, sambil diputar-putar perlahan agar busi terpegang oleh socket. Sesudah busi terpegang socket, maka diarahkan ke dalam ulir di kepala silinder (cylinder head). Lalu socket diputar ke kanan (searah jarum jam) agar busi terkunci. 

Karena busi tidak tertahan di socket, cara ini memang berhasil mencegah socket tertinggal di dalam lubang busi. Tapi cara ini sebenarnya tidak dianjurkan. Karena saat busi dimasukkan ke dalam lubang, ada kemungkinan terjatuh dan merubah celah (gap) busi. Juga karena busi tidak terpegang dengan baik oleh socket, ada kemungkinan busi tidak masuk sempurna ke dalam ulir atau drat kepala silinder. Sehingga bisa merusak drat di kepala silinder, dan akan mahal biaya perbaikannya.