Matched Content

Wednesday, January 18, 2012

How To Stop Car Without Brake


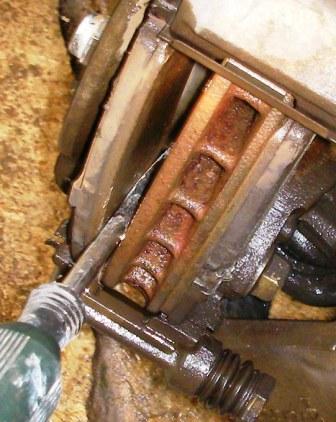
One of standard procedure before starting a car is to step on brake pedal, ensure gearshift in neutral position, it is useful to check brake condition and ensure vehicle will not move when engine is starting. But often times we found out that the brake did not function properly when we're running a vehicle.

Usually brake will not fail instantly. If any brake fluid leaks on front brakes, then brakes on rear wheels are still able to function, though not with a good grip. Similarly, if the rear brakes leak, front brakes are still functioning, though not as good as normal. This is because the front brake system and rear brakes system are not in a single system. Although front brake master cylinder and rear brake master cylinder are joint together, but the piston is different, so if the front brake or rear brake leaks, brake hydraulic pressure loss does not occur immediately or all at once.

There is also a system that has a diagonal hydraulic system, which has right front brake and left rear brake are using same hydraulic system, and the left front brake uses the same hydraulic system with the right rear brake. So if there is a leak in the hydraulic brake system on the right front wheel, the left front brake and right rear brake can still be used to stop the vehicle as soon as possible.

Some vehicles have brakes with dual hydraulic, where one hydraulic system is completely separated or independent with the other hydraulic system. Each system operates brake on three wheel, two front wheels and one rear wheels, it is like two triangles. So if brake on one wheel does not work properly then the other three wheels are still working well to stop vehicle as soon as possible.

If the hydraulic brake system is leaking, the pedal will mushy and pedal travel is longer then ussual. In a bad condition, brake pedal can be stepped down to the floor. Usually by pumping the pedal several times, the brakes will get back to work for a while.

If the pedal mechanism jammed, the brakes feel hard when stepped on and short pedal travel.


Drum Brakes
On vehicles with all wheels use drum brakes, such as truck, bus, pick-up, the brakes will have less grip after going through water. This is because layer of water trapped inside drum. To remove this water layer, then run the vehicle with half applied brake. Friction between drum and shoes produces heat and evaporate water layer in drum. Release brake pedal after you get normal grake grip.

You can also apply half brakes before and during your vehicle entering flood, but additional load as moving in flood and stepped on the brake will cause the engine to stop in that flooded road. It would be difficult to start the engine as electrical systems wet, especially for vehicle with gasoline engine.

If you activate the parking brake half, just before entering and while passing through flood, it will not create as much load as when applying brakes. But only rear brakes are dry, while front brakes are wet. So when braking, the rear wheels will possibly to get slippage and the rear end is moving to the left or right (sliding). When rear wheels slip, then a small movement of steering wheel will make the car turn more sharply than normal (oversteer).

On disc brake the water layer is thrown out because of centrifugal force as the wheel rotates, then the brake will dry by itself.


No Brake at High Speed
If you feel that the brakes do not work normally, then immediately stop the vehicle. For the sake of your safety and other people, do not try to gamble with the brake, it is better to have car with engine won't start, than you are speeding with no brake.

But how to stop vehicle that is running fast and with brakes do not work normally??

As in any emergency situation, the main procedure is do not panic.


Emergency Warning Sign
Turn on hazard lights. Keep in mind, when the hazard lights are turned on, then turn lamps do not work. So if you need to inform other drivers that you want to change direction, then turn off hazard lights and switch on turn signal so that other motorists know that you will change direction.

Sound the horn when you need to clear your way, blinking head lights can also help. The sound of horn, blinking headlights, and hazard lights are usually enough to make other motorists understand that you are in an emergency situation.


Brake by Compression
Lower gear (down shift) gradually while throttle pedal released, from 5 to 4 to 3 to 2 and to 1. Vehicle speed decreases with engine compression pressure (engine brake).

It wont be easy to shift to lower gear suddenly, for example from 5 directly to 1, as too much difference in gears speed, the gears will be difficult to engage. You will waste valuable time just to try to down shift the gear from 5 directly to 1. And it will cause damage to the vehicle mechanism. Sudden gear reduction may cause engine overspeed, or engine revolution beyond its limits (over rev). Overspeed on diesel engine can cause piston break, connecting rod will hit cylinder wall and the engine will break. Look at tachometer or RPM meter to ensure the engine rotation is still within safe limit.

On vehicle with rear-wheel drive, sudden gear reduction can cause the rear wheels slip, so that the rear of the vehicle skidded and difficult to control. When rear wheels are slipping, a small steering wheel movement will make the car turn more sharply than it should be (oversteer).

On vehicles with front-wheel drive, sudden gear reduction can cause front wheels slippage. When front wheels are slipping, the vehicle tends to move straight and steering wheel needs to be turned more than normal when turning (understeer).

For vehicles with automatic transmissions, the shifter usually can be directly shifted from Drive to 1, transmission control will automatically do graduall gear change to lower. But it must still consider the effect of wheel slippage as described above (oversteer and understeer), especially if the road slippery.


Hand Brake or Parking Brake
Hand brake or parking brake can be used to slow the vehicle. Do not use the parking brake until the rear wheels locked and skid. Because it can cause oversteer, both on front-wheel drive vehicle, or on the vehicle rear wheel.


Cruise Control
Make sure the cruise control in off position. Usually the cruise control would soon deactivated if the brake pedal or clutch pedal stepped on, but as it is in emergency situation we need to ensure that the switch is positioned off.


Retarder, Jake Brake (Jacobs Brake)
Some vehicles such as trucks, equipped with a retarder to slow the vehicle and it is attached to the transmission. Retarder is usually used on the descent road, where too long brake usage will cause brakes overheating. Retarder can be used in a long time like going down the mountain. Retarder effectiveness decreased at low speeds, because the retarder is fan blades that rotate in oil bath. Some vehicles use electromagnetic retarder. Retarder can prevent engine overspeeding when using engine compression to slowdown the vehicle.

Vehicles with diesel engines were equipped with jake brake, which slows the vehicle by engine compression and the engine rotation is slowed down by the jake brake. Jake brake is a mechanism to leak exhaust valve at the end of piston compression stroke, to avoid the compressed air push piston downward after compression stroke is completed. Without jake brake compressed air will act like spring that push the piston down after compression stroke.

Use retarder and jake brake if your vehicle is equipped with these equipment.


Take advantage of Road Shoulder
Road with shoulder that have gravel or sand, can be used to slow the vehicle. Steer your vehicle to the road shoulder. On the racetrack it is commonly referred as gravel trap.


Road shoulder like the above image, with grass, weeds, and bushes can also slow the vehicle. Choose weeds and bushes that are not too high, with maximum height about same to vehicle floor or about 15 cm or 6 inches for the sedan. For tall vehicles such as jeeps and trucks, the bushes or weeds may be higher. This consideration because we can not clearly see any objects that lie behind the weeds and bushes. There could be a large rock or gutters that can cause severe damage, a vehicle can be tipped over if stuck in a ditch at high speeds.

Once the vehicle stops completely, check your brakes. If it can not be repaired, then you should have your vehicle towed. If hand brake / parking brake can not be functioned, then engage first gear to prevent vehicle moving when parked. But if parking on slope where there is possibility engine compression cannot hold vehicle stand still, add two wheel chocks to ensure vehicle does not move forward nor backward.


Remember: Do not Gambling With Brake.

Sunday, January 15, 2012

Teknik Menghentikan Mobil Saat Rem Blong


Salah satu prosedur standard sebelum menghidupkan kendaraan adalah menginjak rem, memastikan perseneling di posisi netral, hal ini berguna untuk mencheck kondisi rem sambil memastikan kendaraan tidak bergerak saat distarter. Tapi sering kali kita baru mengetahui bahwa rem tidak berfungsi dengan baik justru disaat kita sedang menjalankan kendaraan.

Biasanya rem tidak langsung seketika blong. Jika terjadi kebocoran minyak rem pada rem depan, maka rem di kedua roda di belakang masih dapat difungsikan walau tidak terlalu pakem. Demikian pula jika rem belakang terjadi kebocoran, rem pada kedua roda depan masih berfungsi walau tidak terlalu baik. Hal ini karena sistem rem depan dan rem belakang tidak menyatu. Walau master cylinder rem depan dan rem belakang menyatu, tapi pistonnya berbeda, sehingga jika rem depan atau rem belakang bocor, kehilangan tekanan hidrolik rem tidak terjadi seketika atau sekaligus.

Ada juga sistem yang mempunyai sistem hidrolik diagonal, dimana rem depan kanan mempunyai sistem hidrolik yang sama dengan rem belakang kiri, dan rem depan kiri menggunakan sistem hidrolik yang sama dengan rem belakang kanan. Sehingga jika terjadi kebocoran pada sistem hidrolik rem di roda depan kanan, maka rem depan kiri dan rem belakang kanan masih dapat digunakan untuk menghentikan kendaraan sesegera mungkin.

Beberapa kendaraan memiliki rem yang mempunyai sistem hidrolik ganda, dimana sistem hidrolik yang satu benar-benar terpisah atau independen terhadap sistem hidrolik yang lain. Setiap sistem mengoperasikan rem di tiga buah roda, dua roda depan dan satu roda belakang, seperti dua buah segitiga. Sehingga jika rem di satu roda tidak bekerja baik maka ketiga roda lainnya masih tetap bekerja baik untuk segera menghentikan kendaraan.

Jika sistem hidrolik rem bocor, pedal akan terasa lunak dan langkah pedal menjadi panjang atau rem jadi dalam. Jika sudah parah maka pedal bisa diinjak sampai kandas ke lantai. Biasanya dengan memompa pedal beberapa kali, rem akan kembali bekerja untuk sementara.

Jika mekanisme pedal tersangkut, maka rem terasa keras saat diinjak dan langkah pedal jadi pendek.


Rem Tromol
Pada kendaraan dengan semua rodanya menggunakan rem tromol, seperti pada truck, maka rem akan menjadi kurang pakem saat kendaraan melewati genangan air. Hal ini karena lapisan air terjebak dibagian dalam tromol. Untuk menghilangkan lapisan air ini, maka jalankan kendaraan dengan rem diinjak setengah. Panas akibat gesekan sepatu rem dengan tromol akan menguapkan lapisan air dalam tromol. Lepaskan pedal rem jika rem sudah terasa pakem lagi.

Bisa juga rem diinjak setengah sebelum dan selama memasuki genangan air, tapi tambahan beban akibat genangan air dan rem yang diinjak setengah akan menyebabkan engine mati saat posisi kendaraan di dalam genangan air. Akan sulit menstart engine jika kendaraan terjebak genangan air karena sistem elektrik yang basah, terutama pada kendaraan berbahan bakar bensin.

Jika mengaktifkan rem parkir / rem tangan setengah, sesaat sebelum memasuki dan saat melewati genangan air, maka beban kendaraan tidak terlalu berat seperti jika rem diinjak. Tapi hanya rem belakang yang kering, sedangkan rem depan basah. Sehingga jika dilakukan pengereman, akan ada resiko roda belakang selip dan bagian belakang kendaraan bergerak ke kiri atau ke kanan (sliding). Jika roda belakang selip, maka sedikit gerakan setir akan membuat kendaraan berbelok lebih tajam dari seharusnya (oversteer).

Pada rem cakram lapisan air terlempar keluar karena gaya sentrifugal saat roda berputar, maka rem akan kering dengan sendirinya.


Rem Blong pada Kecepatan Tinggi
Bila anda merasa bahwa rem tidak bekerja sebagaimana biasanya, maka segeralah hentikan kendaraan. Demi keselamatan anda dan orang lain, jangan coba-coba berjudi dengan rem, lebih baik kendaraan anda mogok tidak bisa dijalankan, daripada anda ngebut dengan kendaraan yang remnya blong.

Tapi bagaimana jika kendaraan sedang berjalan kencang dan kemudian diketahui rem tidak bekerja normal??

Sebagaimana pada situasi darurat apapun, prosedur paling utama adalah jangan panik.


Tanda Bahaya
Nyalakan lampu hazard. Perlu diingat, saat lampu hazard menyala maka lampu belok atau lampu sein (sign, turn light) tidak bekerja. Jadi jika anda perlu memberitahu pengendara lain arah yang anda tuju, maka matikan lampu hazard agar lampu belok bekerja sehingga pengendara lain tahu bahwa anda akan berbelok.

Bunyikan klakson jika anda harus meminta jalan dari kendaraan di depan, mengedipkan lampu jauh / lampu besar juga dapat membantu. Bunyi klakson, kedipan lampu besar, dan lampu hazard biasanya sudah cukup untuk membuat pengendara lain mengerti bahwa anda dalam situasi darurat.


Rem dengan Kompresi
Turunkan perseneling secara bertahap sambil melepas pedal gas, dari 5 ke 4 ke 3 ke 2 dan terakhir 1. Sehingga kecepatan kendaraan menurun karena tekanan kompresi (engine brake).

Penurunan preseneling yang tidak bertahap akan sulit dilakukan, misal dari 5 langsung ke 1, karena selisih kecepatan roda gigi yang terlalu berbeda, maka roda-roda gigi akan sulit mengait. Anda akan membuang waktu yang sangat berharga hanya untuk berusaha menurunkan perseneling dari 5 langsung ke 1. Dan akan menyebabkan kerusakan pada mekanisme kendaraan. Penurunan persnelling yang tidak bertahap dapat menyebabkan engine overspeed, atau putaran engine melampaui batasnya. Overspeed pada diesel engine dapat menyebabkan piston pecah, connecting rod menghantam cylinder sehingga dapat membuat engine pecah. Perhatikan tachometer atau RPM meter untuk memastikan putaran engine masih dalam batas aman.

Pada kendaraan dengan penggerak roda belakang (rear wheel drive), penurunan perseneling yang tidak bertahap dapat menyebabkan roda belakang selip, sehingga bagian belakang kendaraan selip dan sulit dikendalikan. Jika roda belakang selip, maka sedikit gerakan setir akan membuat kendaraan berbelok lebih tajam dari seharusnya (oversteer).

Pada kendaraan dengan penggerak roda depan (front wheel drive), penurunan perseneling yang tidak bertahap dapat menyebabkan roda depan selip. Jika roda depan selip, maka kendaraan cenderung bergerak lurus dan sulit dibelokkan walau setir diputar lebih banyak dari seharusnya (understeer).

Untuk kendaraan dengan transmisi otomatis, biasanya tuas perseneling dapat langsung dipindahkan dari Drive ke 1, kontrol tansmisi akan menurunkan gigi secara otomatis dan bertahap. Tapi harus tetap mempertimbangkan efek selip roda sebagaimana dijelaskan diatas (oversteer dan understeer), terutama jika jalan licin.


Rem Tangan atau Rem Parkir
Rem tangan atau rem parkir dapat digunakan untuk memperlambat kendaraan. Perlu diperhatikan agar jangan gunakan rem tangan sampai roda belakang terkunci dan selip. Karena dapat menyebabkan oversteer, baik pada kendaraan berpenggerak roda depan, maupun pada kendaraan berpenggerak roda belakang.


Cruise Control
Cruise control, kadang disebut juga: autocruise, speed control, tempomat; adalah alat untuk menjaga kecepatan kendaraan tetap stabil secara otomatis pada kecepatan yang disetel oleh pengemudi, walau pedal gas tidak diinjak saat kendaraan melaju di jalan lurus seperti di jalan tol. Jika kendaraan anda dilengkapi cruise control, pastikan cruise control dalam posisi mati (off). Biasanya cruise control akan langsung mati jika pedal rem atau pedal kopling diinjak, tapi sebaiknya dipastikan switch nya benar-benar pada posisi mati.


Retarder, Jake Brake (Jacobs Brake)
Beberapa kendaraan seperti truck, dilengkapi dengan retarder yaitu suatu alat untuk memperlambat kendaraan yang terpasang pada transmisi. Biasanya retarder digunakan di jalan menurun, dimana penggunaan rem yang terlalu lama akan menyebabkan rem jadi panas. Retarder dapat digunakan dalam waktu lama seperti saat menuruni gunung. Efektifitas retarder menurun pada kecepatan rendah, karena retarder adalah seperti sudu-sudu fan yang berputar dan putarannya dihambat dalam rendaman olie. Beberapa kendaraan ada yang menggunakan elektromagnet retarder. Retarder dapat mencegah engine overspeed jika memperlambat kendaraan dengan kompresi engine.

Kendaraan dengan diesel engine ada yang dilengkapi dengan jake brake, yaitu memperlambat kendaraan dengan kompresi (engine) dan putaran engine diperlambat oleh jake brake. Jake brake adalah suatu mekanisme katup buang (exhaust valve) yang membocorkan kompresi di saat piston mengakhiri langkah kompresi, agar udara yang terkumpul dan bertekanan tinggi saat kompresi, tidak menekan piston ke bawah saat langkah kompresi engine selesai. Tanpa jake brake maka udara kompresi akan beraksi seperti pegas yang menekan piston ke bawah setelah piston melakukan langkah kompresi. Maka dengan jake brake perlambatan dengan kompresi engine bisa lebih effektif.

Gunakan retarder dan jake brake jika kendaraan anda diperlengkapi dengan kedua alat tersebut.


Manfaatkan Bahu Jalan
Jalan dengan bahu yang mempunyai kerikil atau pasir, dapat dimanfaatkan untuk memperlambat kendaraan. Arahkan kendaraan anda ke bahu jalan tersebut. Pada sirkuit balap biasa disebut sebagai jebakan kerikil (gravel trap).


Bahu jalan seperti gambar diatas, dengan rumput, ilalang, dan semak-semak juga dapat memperlambat laju kendaraan. Sebaiknya ilalang dan semak-semak tidak terlalu tinggi, maximal setinggi lantai kendaraan atau sekitar 15 cm untuk sedan. Untuk kendaraan tinggi seperti jip dan truk, maka semak-semak atau ilalangnya boleh lebih tinggi. Pertimbangan ini karena kita tidak bisa melihat jelas benda-benda yang ada di balik ilalang dan semak-semak tersebut. Bisa saja ada batu besar atau selokan yang dapat menyebabkan kerusakan parah, bahkan kendaraan bisa terbalik jika terjebak selokan saat kecepatan tinggi.

Setelah kendaraan berhenti sempurna, check rem anda. Jika memang tidak bisa diperbaiki ditempat, maka sebaiknya kendaraan anda diderek saja. Jika rem tangan tidak bisa difungsikan maka dapat menggunakan perseneling gigi 1 untuk mencegah kendaraan meluncur saat diparkir. Tapi jika parkir di tempat miring ada kemungkinan kompresi engine tidak mampu menahan kendaraan meluncur, jadi tambahkan dua ganjal roda agar kendaraan tidak meluncur ke depan atau ke belakang.


Ingat: Jangan Berjudi Dengan Rem.


Saturday, January 14, 2012

How To Replace Front Brake Pads

This is an illustrated instruction on how to replace front brake pads. In the four wheeled vehicles, front wheel brake pads worn out faster than the rear wheel brake linings. Because when braking, the front wheels absorb more kinetic energy to reduce vehicle speed. Also because the front wheels are using disc brakes which have smaller pads than the drum brake.

Disc brake is faster dry when wet if compared to drum brake. Water layer on disc will be thrown out by centrifugal force as the wheel rotates, so the faster the vehicle the sooner brakes dry up and normally functioning. The disc can be designed with fan blades inside to pump cooling air, so disc brake is cooler than drum brake.

The figure below shows a disc brake right after washed with water before it’s pads is replaced.


On drum brakes, because the shape of the drum, the water tends to accumulate on the inside of drum and makes it difficult to dry. To dry wet drum brake, eg. after flooded street, apply half brake or pull parking brake half while running the vehicle, the water will evaporate by the heat of friction between drum and brake lining. Drum brakes have bigger pads or shoe and better grip even with smaller brake pressure, so the piston on the drum brake is much smaller than the piston of disc brake. Brake shoe or lining of drum brake is much more durable than pads of disc brake.

Because of the above considerations it is currently designed vehicles with rear drum brakes, drum brakes work well even with low force making it suitable as a parking brake. Drum brake are generally cost less than disc brake, therefore vehicle prices will be more affordable. While disc brakes are placed in the front wheels to ensure the grip when wet.

Front brake pads are replaced when its has thickness less than 3 mm or 1/8 inch. On some vehicles, brake pads have a plate that if touching and rubbing against the disc, it will be making a sound while the vehicle is running. The sound is used as a warning to immediately replace the brake lining.

For vehicles photographed here, replacement of brake pads is performed on 70,150 km, or about 44,000 miles, pads have not been replaced since the car was new. Brake pads usage is operating condition dependent.

The thickness of the brake lining can also be peeked from crevices of wheel spokes, as shown below the worn out brake lining is pointed by yellow arrow.


The figure below shows worn out brake pads on the left, and new brake pads on the right. The new brake pad thickness is about 10 mm or 3/8 inches. A plate is mounted on two pads (in the photo at the top) is the indicator plate that will sound if it is touching and rubbing against the brake disc as a sign that it needs to be replaced. Pad with indicator plate is positioned infront of brake piston and directly pressed by brake piston.


Sometimes brake pad worn out excessively on one side only, it may happen if dirt jams caliper mechanism. So one pad is always pressed and rubbed against disc.

Below is the procedure to replace the front wheel brake pads which is applied to Honda City i-DSI. But with a little modification, this procedure can be applied to other vehicles also.

Park the vehicle, chock the wheels to help the parking brake. Jack the front wheel which needs brake pads replacement. Ensure safety, jackstand should be used to help supporting vehicle incase jack collapsed. Removed wheel can be used as a jackstand by placing under vehicle body to support vehicle if jack collapsed, image below is showing a wooden block is placed above wheel and under car body to to help jack.


After the wheel removed, check if there is leakage of brake fluid, check if any wet component by brake fluid. If any leakage from piston seal, piston housing will be wet. As brake fluid go down, the lower part of piston housing will be wet also. Leakage can also occur on nipple, and brake line connection, check for any wet part on those components.

Break fluid leakage also can be happened to master cylinder or pedal cylinder.

Clean the wheel well and all components including suspension and steering with water in order to make the job cleaner and easier.

Top image shows disc brakes have just cleaned with water, some parts still look wet. Disc brakes work by pressing or clamping pads on either side of the disc. Pads are always touching disc surface, when braking the piston will be pressing pads and clamping the left side and right side of the disc. So on the disc brake, pads are very slightly moved, only pressure is increased while braking.

While on drum brake, brake shoes do not always touch the drum. When braking, piston moves brake shoes outward and to touch the inside of drum, then the piston pressure on brake shoes will determine the braking force. If the shoes are always touching surface inside the drum, then the brake will get hot and jammed. That is why drum brake needs adjustment.

After the wheel is removed, via small window or hole on brake caliper can be seen a thin brake pad (yellow arrow) as the photo below, pad thickness can be measured through this hole to ensure replacement.


By using a screwdriver or prybar or lever to move caliper and retract piston to make pads no longer touch disc. Lever is inserted through caliper hole and into disc fan, and then pull lever to left or right (depending on the position of the wheel) to move the caliper and retract piston to release pads. In the picture below the yellow arrow indicates the position where the lever is inserted.


No need to open the bleeding valve but make sure not to spill brake fluid from the reservoir, because brake fluid will return to the reservoir. The figure below shows the brake reservoir on the left, while on the right is the clutch reservoir. If any spilled brake fluid, flush with water immediately to avoid it damages the paint.


After the caliper is moved, the lever can be inserted between the gap between disc and pad to make sure piston is fully retracted. The figure below shows using jack rod as a lever. Piston should fully retracted to make room for new thicker pads. Be careful not to damage pistorn rubber booth when using lever. Always make sure no brake fluid spilled from the reservoir.


Yellow arrow in photo below shows two caliper bolts, one upper and one lower.


Undo those two bolts that hold the brake caliper. Use the 12 mm ring spanner to loosen the bolt, and 19 mm open end spanner to hold the nut. The following figure shows caliper bolt when loosening, note how to use ring spanner and open end spanner.


Once the caliper removed, use screwdriver to remove pads. The figure below shows screwdriver is prying off the outside pad.


Below photo shows the caliper is removed, both brake pads have also been removed. Seen here two caliper bolts are put back in order not to lose, pointed by two yellow arrows. While the blue arrow point to the bleeding valve that is not opened. Make sure there are no signs of brake fluid leaking, check if any wet component by brake fluid. Usually leakage occurs on piston seal,  nipple, and brake line connection. 

Clean all brake components with water. Check all rubber boots, ensure no torn booth. Torn booth may cause dirt to accumulate and lead to brakes jam and higher fuel consumption, at high speed disc can be really hot to glow and smoke. Dirt can also cause the brakes to be difficult to operate or no brake because the piston can not grip the disc. If the dirt enters piston cylinder, it can damage piston seal causing leak and no brake pressure or hydraulic pressure. Check brake hose and make sure it is not twisted, ensure no brake fluid seepage, brakes will not working if the hose is leaking as no hydraulic pressure. Do not let the caliper hanging with the hose, if necessary tie caliper with a rope to suspension.


Check and clean anti-squeal shims, these shims are needed to prevent squeaking noise when braking. These plates are often forgotten during instalation. In the picture below there are 3 shims, on the very left is the one mounted on the outer brake pad. Two on the right are both intalled to inner brake pad or piston side brake pad, the piston pressure mark is still visible on the far right plate.


 Install new brake pads, see on below picture outer pad is already installed with its anti-squeal shim, as well as inner pad also already installed. For inner pad or piston side pad, sometimes it is difficult to install as its position is difficult to see. So fit inner pad first, because the retaining clip will furl at the opposite side, so it will be difficult to fit inner pad if the outer pad fitted first.


Below picture shows position of indicator plate (yellow arrow) of the piston side or inner side brake pad.


Reinstall caliper, fit and tighten two caliper bolts, do it with the reverse order of disassembly sequence. Always replace brake pad to the left and the right wheel at once to ensure balanced braking and vehicle will not pulled to the left nor right when braking. When tightening wheel nuts or wheel bolts, must always in criss-cross sequence. Test brake performance by running vehicle and brake suddenly, to ensure vehicle can be used safely.

Air bleeding procedure of rear brake hydraulic system is discussed in article: Brake Bleeding Practical Procedure By Only One Mechanic.

For bleeding front brake hydraulic system please read article: Front Brake Bleeding By One Mechanic Only.

If there are air bubbles in the hydraulic system, it will feel like stepping on a foam or balloon when brake pedal is stepped, or mushy pedal, and pedal travel is much longer than normal. Normal pedal travel is between 1-2 cm or 1/2 - 1 inches. As the air bleeding valve is never opened on the above procedure, and no replacement of seals, or other repairement for the hydraulic system, then there is no way for air to get into the hydraulic system. So the vehicle is safe enough to drive.

Considering that the brake fluid also serves to clean the hydraulic system, brake fluid absorbs moisture and water, the possibility of air that seeped into the hydraulic system, or the presence of brake fluid vapor in the system, therefore brake fluid must be drained periodically. Usually brake fluid is drained every 2 years, please refer to your vehicle service manual.


Friday, January 13, 2012

Mengganti Kampas Rem Roda Depan


Instruksi bergambar ini adalah cara mengganti kampas rem roda depan. Pada kendaraan roda empat, kampas rem (brake pad) roda depan lebih cepat habis daripada roda belakang. Karena pada saat pengereman, roda depan lebih banyak menyerap energi kinetik dalam mengurangi kecepatan kendaraan. Juga karena roda depan menggunakan rem cakram (disc brake) yang mempunyai kampas rem yang lebih kecil dari pada rem tromol (drum brake).

Kelebihan rem cakram adalah lebih cepat kering jika basah terkena air dari pada rem tromol. Pada rem cakram lapisan air akan terlempar karena gaya sentrifugal saat roda berputar, sehingga semakin cepat laju kendaraan semakin cepat pula rem mengering dan berfungsi normal kembali. Rem cakram dapat didesain dengan sudu-sudu fan pada bagian tengahnya yang berfungsi mengalirkan udara pendingin, sehingga rem cakram lebih cepat dingin daripada rem tromol.

Gambar dibawah memperlihat rem cakram yang baru dicuci dengan air sebelum diganti kampasnya.


Pada rem tromol, karena bentuk tromol tersebut maka air cenderung mengumpul pada bagian dalam tromol sehingga sulit mengering. Untuk mengeringkan tromol rem yang basah, misal sehabis melewati jalan banjir, maka injak rem setengah atau rem tangan ditarik setengah sambil menjalankan kendaraan, air pada tromol akan menguap karena panas gesekan kampas rem dengan tromol. Rem tromol mempunyai kampas rem yang jauh lebih besar sehingga lebih pakem, walau dengan gaya tekan rem yang lebih kecil, karena itulah piston pada rem tromol jauh lebih kecil daripada piston rem cakram. Kampas rem tromol (sepatu rem, brake shoe, brake lining) jauh lebih awet dari kampas rem cakram.

Karena pertimbangan diatas itulah saat ini didesain kendaraan dengan rem tromol dibagian belakang, rem tromol bekerja baik walau dengan gaya tekan rendah sehingga cocok sebagai rem parkir. Rem tromol umumnya berharga lebih murah dari rem cakram, sehingga harga kendaraan akan lebih terjangkau. Sedangkan rem cakram ditempatkan di roda depan agar selalu pakem walaupun baru saja terkena air.

Kampas rem depan diganti apabila ketebalannya sudah menipis dibawah 3 mm atau 1/8 inchi. Pada beberapa kendaraan, kampas rem mempunyai pelat yang jika menyentuh dan bergesekan dengan cakram akan menimbulkan bunyi seperti ada plat bergesek saat kendaraan berjalan. Bunyi inilah digunakan sebagai peringatan untuk segera mengganti kampas rem.

Pada kendaraan yang diambil fotonya disini, penggantian kampas rem dilakukan pada 70.150 km, atau sekitar 44.000 mile, kampas rem belum pernah diganti sejak kendaraan ini masih baru. Pemakaian kampas rem bergantung kondisi operasional.

Ketebalan kampas rem juga dapat diintip dari celah-celah roda (wheel spokes), sebagaimana gambar dibawah panah kuning menunjukkan kampas rem yang sudah aus.


Gambar dibawah memperlihatkan kampas rem yang sudah aus disebelah kiri, dan kampas rem yang masih baru di sebelah kanan. Jika masih baru ketebalan kampas sekitar 10 mm atau 3/8 inchi. Pelat yang terpasang pada kedua kampas rem (di foto di bagian atas) adalah pelat indikator yang akan berbunyi jika menyentuh dan bergesekan dengan cakram untuk menandakan kampas rem sudah harus diganti. Kampas yang mempunyai pelat indikator adalah kampas untuk posisi bagian dalam atau kampas yang langsung ditekan piston.


Kadang terjadi keausan yang tidak sama pada kampas rem, hal ini bisa terjadi karena adanya kotoran yang membuat mekanisme kaliper macet. Sehingga salah satu kampas selalu tertekan dan menggesek cakram.

Berikut ini adalah prosedur untuk mengganti kampas rem roda depan yang diterapkan pada Honda City i-DSI. Tapi dengan sedikit penyesuaian, bisa diterapkan pada kendaraan lain.

Parkirkan kendaraan, ganjal roda untuk membantu rem parkir. Dongkrak roda depan yang akan diganti kampas remnya. Pastikan keamanannya, sebaiknya menambahkan jackstand karena dongkrak bisa rubuh. Bisa juga dengan masukkan atau roda yang sudah dilepas kebawah kendaraan agar jika dongkrak rubuh maka roda akan menahan kendaraan agar tidak rubuh, lihat gambar di bawah ditempat kayu diatas roda dibawah body kendaraan untuk membantu dongkrak.


Sesudah roda terlepas, check jika ada kebocoran minyak rem, ditandai dengan adanya komponen yang basah oleh tetesan minyak rem. Jika ada kebocoran pada seal piston maka akan terlihat lembab atau basah di sekitar rumah piston, karena tetesan minyak rem jatuh ke bawah maka akan terlihat basah di bagian bawah rumah piston. Kebocoran juga bisa terjadi pada nipel, dan sambungan saluran rem, periksa apakah ada bagian yang basah pada komponen-komponen tersebut.

Kebocoran minyak rem juga dapat terjadi pada master cylinder atau silinder pedal.

Bersihkan spakbor dan semua komponen roda termasuk suspensi dan steering dengan semprotan air agar memudahkan pekerjaan.

Gambar paling atas menunjukkan rem cakram yang baru saja dibersihkan dengan air, terlihat beberapa bagian masih basah. Rem cakram bekerja dengan menekan atau menjepit kampas di kedua sisi cakram. Kampas selalu menyentuh permukaan cakram, saat pengereman maka piston akan menekan kedua kampas menjepit sisi kiri dan sisi kanan cakram. Jadi pada rem cakram, kampas rem nyaris tidak bergerak, hanya tekanan jepitannya saja yang dinaikkan disaat pengereman.

Sedangkan pada rem tromol, sepatu rem tidak selalu menyentuh tromol. Saat pengereman, piston mendorong sepatu rem untuk bergerak keluar dan menyentuh sisi dalam tromol, lalu tekanan piston pada sepatu rem akan menentukan kekuatan pengereman. Jika sepatu rem tromol selalu menyentuh permukaan di dalam tromol, maka rem akan menjadi panas dan macet. Itulah sebabnya rem tromol memerlukan penyetelan.

Sesudah roda dilepas, dari lubang yang ada dibagian penjepit rem (caliper) dapat terlihat kampas rem yang sudah tipis sebagaimana foto dibawah yang ditunjuk panah kuning, ketebalan kampas dapat diukur melalui lubang ini untuk memastikan penggantian.


Dengan menggunakan obeng atau alat mengungkit, ungkit caliper agar piston masuk sehingga kampas rem tidak lagi terjepit. Pengungkit dimasukkan melalui lubang caliper hingga ke dalam fan dari cakram, lalu ungkit ke kiri atau ke kanan (tergantung posisi roda) agar caliper bergerak dan kampas rem tidak terjepit lagi atau terbebas. Pada gambar di bawah panah kuning menunjukkan posisi tempat pengungkit dimasukkan.


Tidak perlu membuka katup buang angin (bleeding valve) tapi pastikan tidak ada minyak rem yang tumpah dari reservoir, karena minyak rem akan kembali ke reservoir. Gambar dibawah menunjukkan reservoir rem di sebelah kiri, sedangkan di sebelah kanan adalah reservoir kopling. Jika ada minyak rem tumpah, segera siram dengan air agar tidak merusak cat.


Jika caliper sudah bergerak, maka pengungkit dapat dimasukkan ke celah diantara kampas rem dan cakram sehingga piston benar-benar masuk. Gambar dibawah menunjukan pengungkit berupa gagang dongkrak. Piston harus benar-benar masuk untuk memberi ruang bagi kampas baru yang lebih tebal. Hati-hati saat mengungkit jangan sampai merusakkan karet abu piston. Selalu pastikan tidak ada minyak rem tumpah dari reservoir.


Pada gambar dibawah terlihat dengan panah kuning dua buah baut caliper, satu diatas dan satu dibawah.


Kendorkan dua buah baut yang mengikat caliper rem. Gunakan kunci ring 12 mm untuk mengendurkan baut, dan kunci pas 19 mm untuk menahan mur agar tidak ikut terputar. Gambar berikut memperlihat kan saat baut caliper dikendurkan, perhatikan cara menggunakan kunci ring dan kunci pas.


Setelah caliper terlepas, ungkit kedua kampas rem dengan obeng. Gambar dibawah menunjukkan saat kampas rem bagian luar diungkit dengan obeng.


Di bawah ini terlihat caliper sudah terlepas, kedua kampas rem juga sudah dilepas. Terlihat juga kedua baut pengikat caliper dipasang kembali agar tidak hilang, ditunjuk oleh dua panah kuning. Sedangkan panah biru menunjukkan bleeding valve yang sama sekali tidak dibuka atau dikendorkan. Pastikan lagi tidak ada tanda-tanda kebocoran minyak rem, yaitu adanya komponen di caliper yang basah oleh lelehan minyak rem. Biasanya kebocoran terjadi pada piston caliper, nipel, dan sambungan saluran minyak rem.

Bersihkan semua komponen rem dengan air. Periksa semua karet abu jangan ada yang sobek. Karet abu yang sobek dapat mengakibatkan kotoran terkumpul dan menyebabkan rem macet yang dapat memboroskan bahan bakar, pada kecepatan tinggi bisa terlalu panas hingga cakram berpijar dan mengeluarkan asap. Kotoran bisa juga menyebabkan rem jadi sulit dioperasikan alias tidak pakem karena piston tidak bisa menjepit cakram. Jika kotoran masuk ke silinder piston, maka dapat merusak karet piston (seal) hingga bocor dan rem jadi blong. Periksa selang rem dan pastikan tidak terbelit atau ada rembesan, rem bisa blong jika selang bocor karena tidak ada tekanan hidrolik. Jangan biarkan caliper tergantung pada selangnya, jika perlu ikat caliper dengan tali pada suspensi.


Periksa dan bersihkan pelat-pelat pelapis kampas (anti squeal shims), pelat ini berguna mencegah suara berdecit saat rem digunakan. Pelat-pelat ini sering terlupakan saat pemasangan. Di gambar bawah tampak ada 3 buah pelat, paling kiri terpasang pada kampas luar, kedua pelat disebelah kanan terpasang pada kampas bagian dalam atau kampas bagian piston, masih tampak bekas tekanan piston pada pelat paling kanan.


Pasang kampas rem yang baru berikut shim, tampak di foto di bawah kampas bagian luar sudah terpasang dengan shimnya, demikian juga kampas bagian dalam. Untuk kampas bagian dalam atau bagian piston kadang agak sulit dipasang karena posisinya yang sulit dilihat. Jadi pasang kampas bagian dalam terlebih dulu, karena klip penahan kampas akan lebih menguncup pada posisi kampas dalam, jika kampas luar terpasang duluan.


Tampak dibawah posisi pelat indikator rem (panah kuning) dari kampas bagian piston diposisikan diatas.


Pasang kembali caliper dan kencangkan kedua bautnya, dengan urutan kebalikan urutan pembongkaran. Selalu ganti kampas rem untuk roda kiri dan roda kanan bersamaan agar pengereman seimbang dan kendaraan tidak tertarik ke kiri ataupun ke kanan saat direm. Jangan lupa saat mengencangkan mur atau baut roda harus selalu bersilangan. Uji kinerja rem dengan menjalankan dan mengerem mendadak, agar kendaraan dapat dipastikan untuk digunakan dengan aman.

Prosedur pembuangan angin (air bleeding) dari sistem hidrolik rem dibahas di artikel Cara Praktis Buang Angin Rem Oleh Satu Mekanik untuk rem belakang.

Sedangkan untuk rem depan dijelaskan di artikel: Buang Angin Rem Depan Oleh Satu Orang Mekanik.

Jika ada gelembung udara di dalam hidrolik rem maka akan terasa seperti menginjak busa atau balon saat pedal rem diinjak, dan gerakan pedal jauh lebih panjang dari normal. Normal gerakan pedal adalah antara 1-2 cm atau 1/2 - 1 inchi. Karena katup buang angin tidak pernah dibuka pada prosedur diatas, dan tidak ada penggantian seal, ataupun perbaikan lainnya pada system hidrolik, maka tidak ada jalan bagi udara untuk masuk ke dalam sistem hidrolik. Jadi kendaraan sudah cukup aman untuk dikendarai.

Menimbang bahwa minyak rem juga berfungsi untuk membersihkan sistem hidrolik, minyak rem dapat menyerap embun atau air, kemungkinan adanya udara yang meresap ke dalam sistem hidrolik, kotoran seperti sisa karet seal piston dan karat di dalam sistem, maka sebaiknya minyak rem harus dikuras secara periodik. Biasanya minyak rem dikuras setiap 2 tahun sekali, harap merefer ke service manual kendaraan anda.


Monday, January 9, 2012

Power Factor Improvement by Capacitor

Capacitor is commonly used to improve the power factor (pf, Cos Phi) on alternating current (AC). This method is quite popular, and it is applied in fluorescent lamps, motors, transformers, etc.. The schematic diagram can be seen in the figure below. Instruments needed are Power meter (P) and Ammeter (A). Capacitor (C) have a certain value, not too big, and not too small, so that the power factor will be close to 1 (one, ideal) and economical electric power consumption. The position of the capacitor should be as close as possible to the load.


To check voltage and current waveform  simulation chart at a specific power factor is discussed in separate articles. The definition of: efficiency, power factor,watts, voltamperes; are also discussed in a separate article.


Sample calculation below is contained in the attached Excel sheet which has formulas to calculate power factor correction by capacitor. Before the capacitor installed to improve power factor, firts we need to know how much power factor which occurs to a certain power load (real power).

Suppose the data obtained as follows:
Frequency: 60 Hz
Voltage: 220 volts
Current: 1 amperes
Real power: 160 watts

Supplied power by power source:

apparent power = 220 volts x 1 amperes = 220 voltamperes

Power factor = pf = real power / apparent power = 160/220 = 0.73

Then calculate reactive power by Pythagoras formula:

Reactive power = ((apparent power)2 - (real power)2) 1 / 2
            Reactive power = (2202 - 1602) 1 / 2 = 151 var (reactive voltamperes)

Based on reactive power data above, then the reactive load can be obtained:

Reactive load = Voltage2 / reactive power = 2202/151 = 320.5 W

To calculate the amount of capacity, we use Faraday's formula:

Capacity = 1 / (2p x frequency x reactive load) = 1 / (2p x 60 x 320.5) = 8.27 μf

If we pick and install parallel 8 μf capacitor to correct power factor, then the value for the capacitive reactance by this capacitor is:

xc = 1 / (2 p x 60 x 8 x 10-6) = 331.44 W

Current flowing to capacitive reactance is:

ac = 220 / 331.44 = 0.66 amperes

For reactive power for the this capacitive reactance, please note that the vector is opposite to reactive power before, so it has a negative sign (-) :

pc = 220 x 0.66 = - 146.03 var

The new or total reactive power is : Q1 = 151 - 146.03 = 4.97 var

Corrected apparent power is :

S1 = ((real power)2 + (new reactive power))1 / 2 = (1602 + 4.97)1/2 = 160.08 va

Therefore the improved power factor is:

pf1 = 160 / 160.08 = 0.9995